Welcome to the Ship My Plants selling experience! You’ll be shipping plants, pruners and potting soil through the Ship My Plants platform within 24 hours.
Before you sell your first aloe or accessory, you’ll need to set up and populate your online shop. You’ll be guided through two processes:
- Setting Up Your Account.
- Setting Up Your Store.
Don’t stress—it’s easy! Having certain information and documents on hand will help you through the process with little or no delay. Before you begin, be sure to have or prepare to set up:
- Your business tax information including EIN.
- A free Stripe.com account for secure business withdraws, and
- Shipping carrier information for USPS, FedEx or UPS.
Let’s Set Up Your SMP Account
If you are not there already, head over to www.ShipMyPlants.com. Click on the white “Sell” box in the upper right OR on the blue “Sell Your Plants” under the site’s main image. And you’re on your way!
Next:
- Pick Your Seller Package Subscription (required). You have 8 choices, from Green Starter Annual Membership to Green God Annual Membership. Each package offers a specific number of allowed sale items for select time periods.
- Enter the name of the person who will be working most directly with the online store, create a username based on the store’s name (it can include characters, numerals and punctuation), create a password and click “Get Started.”
From here, fill in the billing information (they accept all sorts of payment methods), review the privacy policy and terms and conditions, check the box that you did so, and click “Place Order.”
Before You Begin
Don’t skip the Before You Begin page—it has very helpful information, so read it! When you’ve gathered all necessary documents (and an energizing beverage), select the “Let’s Go!” button, and let’s go!
About Your Business
You now have the opportunity to not just fill in the details of your shop (size, digital presences, etc.), but also the chance to sell yourself so that selling your plants is that much easier. Make that connection to your future customers by crafting your Business Bio with your business’s story in mind. When you’re done, click “Next.” Note: Clicking “Previous” will delete any information on this page.
The next three screens (About Your Products, About Your Online Selling Experience and About Your Shipment) are chances to choose your product categories and share your previous online selling experiences with the folks at Ship My Plants. Will you benefit from some help on what to sell or pricing? Will you need assistance with figuring out shipping or finding the right packaging? You can then indicate what shipping providers you’ll be working with.
Payment Setup
This screen will momentarily take you out of the Ship My Plants platform and onto Stripe.com, a third-party express payment method service, which will allow you to receive funds from customers. Click the blue “Connect with stripe” box to link your account to receive funds with the stripe payment service. If you have an existing stripe account, just enter the email and password associated with that account. Otherwise go through the process to sign up for a new stripe account.
- The Stripe interface is straightforward and user-friendly. You’ll be asked to enter the type of business (i.e. Individual, Company or Nonprofit), its legal name, email, date of birth of the user, an address, the last four digits of your Social Security number, professional details of the category you are selling, bank details and your sign-in credentials and the account into which you’ll accept payments, click done. You’ll be taken back to the “Select an Account for Payouts” page with your newly linked account, which will be auto-selected. Click “Continue”.
- Next you’ll “Review Your Details,” still within the stripe signup site. Make changes if need be, then confirm all is correct with the “Agree & Submit” button.
- You’ll now be taken back to the Ship My Plants Payment Setup page with payment details. To proceed, click “Next.” To disconnect the accounts from the express payment method, click disconnect.
**
Let’s Set Up Your Store
You now have an account, so let’s set up your store!
Once you clicked your last “Next” on the Account Setup section, you are taken to the Dashboard. This is your control center where you will be able to check the status of your orders, add plant and product items to your store, run reports and a host of other tasks.
But before you do any of that, you’ll need to build or design your store, set up shipping options and link to ShipStation, a web-based shipping management solution. To begin, click on “Settings,” the last item in the blue navigation bar on the left. We’ll go through each item listed under “Settings.” (Tip: A vertical white bar will let you know which Settings page you are on, as will a header at the top of the page.)
Settings
Store
This is where you include graphics, banners, store location and information, terms and conditions and so forth. The items it asks you for are straightforward, with just a few items to note:
- The banner image should be a decorative element; perhaps a photo of a display in your store or a general photo of varieties of plants you sell.
- The profile image should be your store’s logo.
- The email address should be the address of the person who will receive order and shipping information.
- If you have a terms and conditions policy, insert it on this page.
Also good to know is that this is where you can set or change your store hours to be visible on your page, and also where you can indicate a vacation message and not taking orders at this time.
NOTE! After any changes you make to this page, click the “Update Settings” button on the bottom. You can preview what your store looks like by clicking on the “Visit Store” icon (a square with an upwardly right directional arrow) that is the first of three images in the very last line of the navigation bar.
Payment
This step has already been completed in the Account Setup. However, in the future should you need to update or make changes such as to a payment method or a credit card, this allows you to access and adjust that information.
Shipping
Before beginning this portion of the Store Setup, research your available shipping rates with the carriers you use or plan to use. With that information handy, you’ll enter shipping zones and rates for those zones.
Think of your Custom Zones as concentric rings around your location. Custom Zone 1 will be the ring closest to you. Each subsequent Custom Zone will be a “ring” size of your choice for as far as you wish to deliver or ship. Zones can be delineated by ZIP codes or states. Not all Custom Zones need be utilized.
After setting the Custom Zone, you’ll click on Add Shipping Method for that Zone. A drop-down menu offers three choices:
- Flat Rate
- Local Pickup
- Free Shipping
Note: Free Shipping is a popular choice of SMP stores.
Click “Save Changes” once you’ve chosen a method, then click “Back to Zone List” to input further Custom Zones until all your delivery and shipping regions have been input.
ShipStation
NOTE: If you are offering local pickup or delivery via your own vehicles, you may bypass the ShipStation setup.
Ship My Plants uses ShipStation to retrieve and manage your orders, and print labels and packing slips for those orders.
- Get started by copying the Authorization Key (red text), opening a new window in your browser, and going to www.Shipstation.com.
- Once you fill in the required information, you’ll be taken to the “Welcome to ShipStation” page. Here you will click on “Connect a Store.” From the store/marketplace list, you will select “Woo Commerce” (near the end of the list).
- The screen you are brought to is where you will paste the Authorization Key. You will also grab your Ship My Plants URL (do this from the SMP site) and paste in the appropriate box. All other dialog boxes remain as is. Click “Connect.”
- From this next screen, you are able to add your carrier accounts, choose your label layouts and set a “Ship From” location.
ShipStation includes a helpful Quick Start Guide, which you can find a link to near the top of this page. It lays out your next steps for proceeding in both text and video format. If you have questions about ShipStation—from setting up your shipping labels to tracking orders—you’ll find it here!
Social Profile and Store SEO
These sections are self-explanatory. We recommend completing the basics for these two sections quickly, as they can always be enhanced after you populate your store with products.
NetPS Plant Database
The NetPS Plant Database is a listing of 40,000 plants, and your offerings are more than likely listed among them.
Click on the NetPS Plant Database near the top of the blue navigation bar. Within the catalog that pops up you’ll be able to search for your shop’s plants by common name and botanical name.
When you find a plant you are selling, click the box to the left of its photo. After selecting your plants (or even just a portion of them), click on the green “Add to Store” box in the upper right to add that item to your shop.
Products
The Products page is where you can edit the information that was pulled in from NetPS Plant Database and include/adjust additional information on each plant. From this page you can:
- Add photos of your own plants (and delete those pulled in from NetPS Plant Database)
- Adjust/add plant attributes
- Set pricing
- Set expected shipping season/month
- Set shipping and tax information
- Set SEO and tags
This page also lets you add other items not included in the NetPS Plant Database, such as gardening tools, accessories, hard goods, plant food, amendments and so on.
Take advantage of the great variety of these items that are already in the Ship My Plants database. There’s no need to input all the data for Espoma Bio-tone, for example, as its product information is already in their system. To do so:
- Click the green “Add New Product” button in the upper right of your Products page.
- Click “Search Similar Products in the Marketplace.”
- Include the search terms for the product you want to add in the search dialog box.
- Select your product from the search results list.
If you have original products such as your own handmade crafts, simply upload a photo and product information manually.
More Recent Posts

Portulaca: The Underrated Jewel of the Garden
Shop Portulaca on ShipMyPlants.com


Unveiling the Charm of Phlox
Pink Garden Phlox
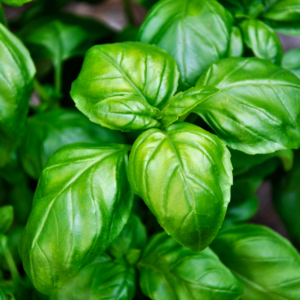
10 Plants That Act as Mosquito Repellent
Basil is a great mosquito repellent plant.

Dianthus Delights: Perennial Pinks Shine
Imagine a garden where vibrant colors and sweet fragrances waft through the air — this is the magic that Dianthus, commonly known as pinks, brings to any outdoor space. Easy to grow and bursting with charm, Pinks varieties are the perfect addition to make your garden pop. Let’s dive into the joyful world of these…
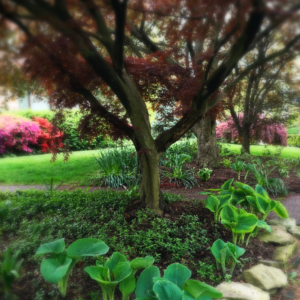
Embrace the Shade: 10 Plants Thriving Under Trees!
Hey there, green thumbs and nature enthusiasts! Are you facing the challenge of gardening in the shade? Fear not! Instead of seeing those leafy giants overhead as a hindrance, let’s turn them into opportunities. Yes, we’re talking about planting beneath trees! While some might think that the shade beneath trees spells disaster for gardening, there’s…